
- Quick Comparison
- Why Construction Timelines Break Down Without a Clear Framework
- 1. Set Clear Start and Finish Dates
- 2. Build a Baseline Schedule With Milestones
- 3. Sequence Trades Around Real Dependencies
- 4. Plan for Permit and Inspection Lead Times Early
- 5. Align Material Procurement With Installation Dates
- 6. Add Buffer Time for Weather, Labor, and Supply Risks
- 7. Use Daily Logs to Track Planned vs. Actual Progress
- 8. Review and Update the Schedule Every Week
- 9. Centralize Timeline Management With Contractor Foreman
- Tables to Support the Best Practices
- Conclusion
- FAQs
Construction timelines are a lot like dominoes.
One permit gets delayed, the framing crew gets pushed back. When the framing crew gets pushed back, the electricians can’t start. When the electricians wait, drywall gets rescheduled…
And before you know it, a two-day delay has turned into two weeks!
If you’ve run more than a handful of projects, none of this is news to you. It’s simply part of the job — something to be expected in every project the same way we expect the sun to set in the west. So it’s not even a matter of preventing something that could slip. Something ALWAYS slips.
It doesn’t mean you should just be passive about it though. Otherwise, you’d be closing your business. Why? Most construction delays get expensive really fast — an average of $1,500 to $5,000 per day on residential work and $10,000 to $50,000 per day on commercial jobs.
That’s why the goal isn’t a bulletproof schedule (there’s no such thing). It’s a schedule built to absorb the hit when something slips — so a delay stays a delay, instead of snowballing into a two-week disaster and a very unhappy client.
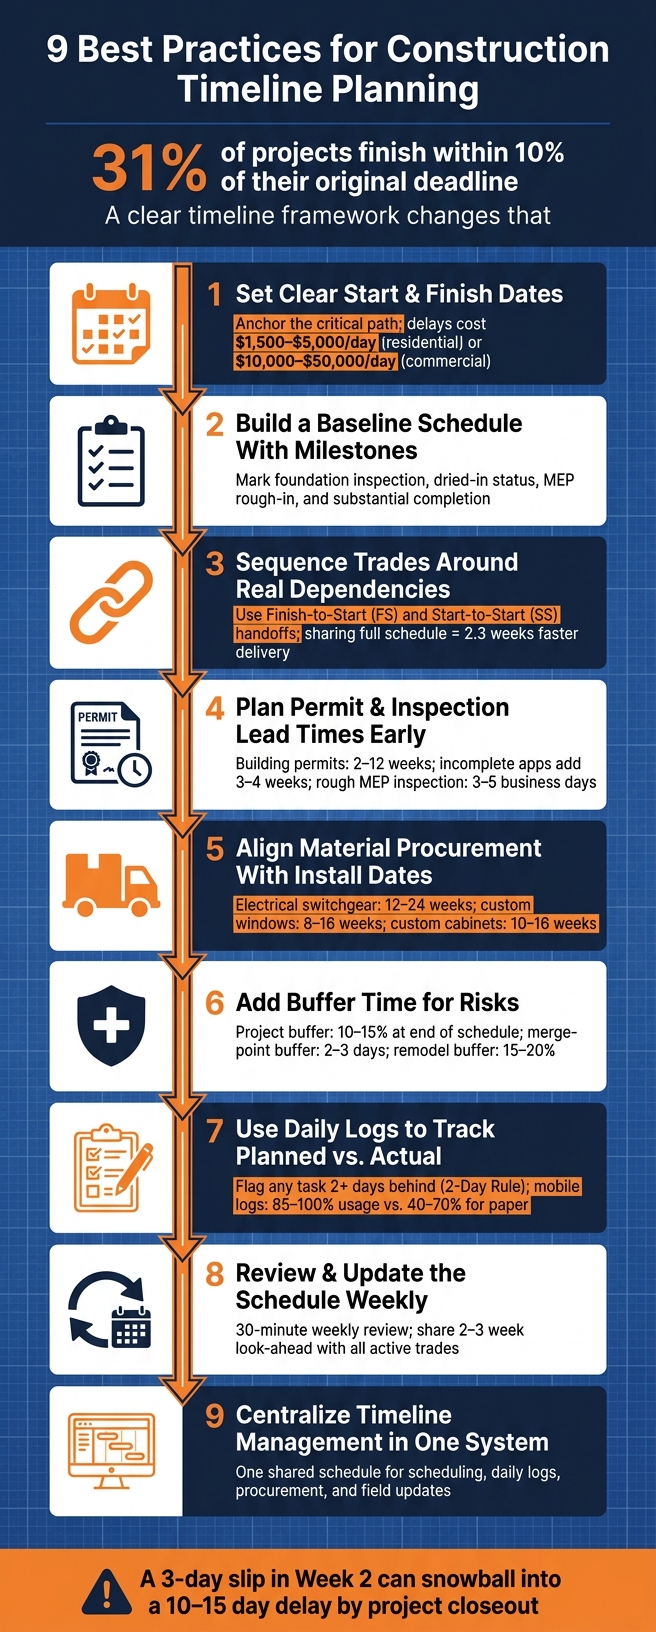
Here are 9 best practices to help you get there:
- Set a clear start date and finish date
- Build a baseline schedule with milestone checkpoints
- Sequence trades by actual field dependencies
- Add permit and inspection time before work starts
- Tie purchasing to installation dates
- Place buffer on high-risk parts of the timeline
- Use daily logs to compare planned vs. actual work
- Update the schedule every week
- Keep schedule data in one system
9 Best Practices for Construction Timeline Planning
Quick Comparison
| Best Practice: | What to focus on: | Why it matters: |
|---|---|---|
| Clear dates | Start and finish targets | Keeps the team aligned |
| Baseline schedule | Milestones and critical path | Shows schedule drift early |
| Trade sequencing | FS and SS handoffs | Stops crews from colliding |
| Permit planning | Review and inspection lead times | Prevents idle time before field work |
| Procurement planning | Order-to-install timing | Cuts delivery-based delays |
| Buffer time | End-of-job and merge-point slack | Helps absorb common setbacks |
| Daily logs | Quantities, crews, weather, blockers | Shows planned vs. actual progress |
| Weekly reviews | Look-ahead updates and float checks | Keeps dates current |
| One shared system | Central schedule and field updates | Cuts confusion across teams |
In short: it’s about building a schedule people can actually implement in the field, not just one that looks good on paper. Using advanced scheduling strategies ensures your plan remains realistic throughout the project lifecycle.
sbb-itb-5eea312
Why Construction Timelines Break Down Without a Clear Framework
Most schedule failures start small. A 3-day slip in week 2 can turn into a 10- to 15-day setback by the end of the project.
That’s how schedule drift works: a small miss early on keeps snowballing.
A weak schedule creates trouble from day one. If drywall starts before MEP rough-in signoff, trades show up out of order, labor gets wasted, and downstream work stalls. Permit and inspection issues do the same thing. Incomplete permit applications can add 3 to 4 weeks, and inspection turnarounds often take 3 to 5 business days.
Poor material allocation and lead times are another quiet problem. Custom windows, cabinetry, and structural steel can take weeks or even months to arrive. If delivery dates aren’t tied to install dates, one late order can leave several trades standing around with nothing to do.
Bad schedules also tend to be unrealistic from the start. And without solid daily logs, a 3-day slip in week 2 may not show up until week 5. By then, downstream trade commitments can make recovery much more expensive. That’s why production should be tracked in concrete units, not vague “percent complete” guesses.
Schedules with zero float are set up to break. One delay – a late inspection, a weather day, or a missing submittal – can push the finish date right away. Use U.S. work calendars, MM/DD/YYYY dates, and a 10% to 15% buffer to help absorb delays.
These are the pressure points behind the next nine practices: dates, sequencing, lead times, tracking, and review.
1. Set Clear Start and Finish Dates
Every construction project needs a set window to work within. A firm start date and a committed finish date give you a schedule baseline – the approved reference point your team uses to track progress and spot drift. Those dates anchor the baseline schedule.
When dates aren’t fixed, things start to wobble. Subcontractors show up too early, materials get ordered too late, and small delays become much harder to pull back.
A finish date also makes critical path planning possible. The critical path is the chain of dependent tasks that controls the finish date. If one task in that chain slips, the whole project finish moves with it. Once that target is set, you can line up each trade and milestone against the same finish date.
A smart move here is to track an internal target date while protecting the client deadline with managed float. That buffer matters because delay costs add up fast. Residential delays usually cost $1,500 to $5,000 per day, and commercial delays can hit $10,000 to $50,000 per day. Many construction contracts also include liquidated damages clauses tied straight to the completion date, which means a missed finish date can cost more than the delay itself.
With dates locked in, the next step is to map milestones into an efficient construction schedule.
2. Build a Baseline Schedule With Milestones
Once the dates are set, build a baseline schedule around milestones. That matters because a baseline isn’t just a list of tasks on a calendar. It gives you clear checkpoints that show whether the job is moving the way it should.
Use milestones for points like foundation inspection, dried-in status, MEP rough-in complete, and substantial completion. These are completed checkpoints, so they make progress much easier to explain to stakeholders without dragging everyone into task-by-task details. From there, use those milestone dates to line up the trade sequence that comes next.
You also need to mark the critical path – the linked tasks that control the finish date. Tasks on that path have no slack, so if one slips, the whole project slips with it. It also helps to watch near-critical paths, where only 3 days or less of float remain. That small cushion can disappear fast after one weather delay or a crew shortage, turning that path into the new critical path.
A small miss early on can get ugly fast. A 3-day delay caught in week 2 usually snowballs into a 10–15 day delay by the end of the project if no one steps in. That’s why any task that falls 2 days behind baseline should be flagged and corrected right away.
For milestone dates, use PERT – (Optimistic + 4 × Most Likely + Pessimistic) ÷ 6 – to set dates that make sense in the field. It keeps the schedule grounded, and those dates then drive the install order in the next step.
3. Sequence Trades Around Real Dependencies
Once milestones are set, map trade work around what actually has to happen in the field.
For each task, ask: What must finish before this starts?
Then place those handoffs in the baseline schedule so the critical path sets field order, instead of habit or guesswork.
Most trade handoffs use a Finish-to-Start (FS) relationship. That means one crew has to be fully done before the next crew can begin. MEP rough-ins need to pass inspection before drywall closes the walls. Cabinets also need to be fully installed before countertop templating can start, and that often adds a 1–3 week lead time before installation. Miss those handoffs, and the jobsite can get crowded fast. Crews stack on top of each other, work slows down, and delays start to pile up.
That said, not every task has to sit idle until another one wraps up. Plumbing and electrical rough-ins can often move at the same time in different zones with a Start-to-Start (SS) relationship. A simple way to make that work is to zone the site by floor or room so trades keep moving without getting in each other’s way.
| Handoff Point | Dependency Type | Key Risk |
|---|---|---|
| Foundation to Framing | Finish-to-Start | Concrete needs time to cure; framing too early risks structural issues |
| MEP Rough-in to Insulation | Finish-to-Start | Rough-in inspection must pass before walls close |
| Cabinets to Countertops | Finish-to-Start | Cabinets must be fully installed before templating |
| Drywall to Paint | Finish-to-Start | Mud must dry before paint |
Before work begins, hold a 30-minute subcontractor kickoff meeting to walk through the sequence map. Each trade should know who comes before them and what site conditions they’ll inherit. That upfront alignment matters. Contractors who share the full schedule with all subcontractors from day one finish an average of 2.3 weeks faster.
Next, lock in permit and inspection lead times before you finalize field start dates.
4. Plan for Permit and Inspection Lead Times Early
Build permit and inspection lead times into the baseline before field start dates get locked. And treat permits and inspections as scheduled activities, not milestones.
Each permit has its own chain of work: prepare the package, submit it, wait for plan review, respond to comments, make revisions, and get issuance. Building permit reviews can take 2–12 weeks depending on the jurisdiction. If the application is incomplete, that can add another 3–4 weeks on average. Put that time into the baseline schedule from day one.
A rough MEP inspection also needs breathing room. The scheduling lead time is usually 3–5 business days. Before you request it, add a readiness milestone and a short internal pre-inspection walk to confirm all rough-ins are done. That small check can help you avoid a failed inspection and the 3-day re-inspection delay that follows.
A permit register helps keep the whole thing from turning into a mess.
What you have to track:
- every required approval
- the issuing authority
- the documents needed
- the work it gates
- the earliest submission date
- one accountable owner
Review it every week. Early code research can prevent 60% of plan revision requirements during review.
Here’s a quick reference for common permit and inspection lead times to build into your baseline schedule:
| Permit / Inspection Phase | Typical Lead Time | Scheduling Predecessor |
|---|---|---|
| Building Permit Review | 2–12 weeks (varies by city) | Final construction drawings |
| Grading Permit | 2–4 weeks (often faster than building) | Site survey / civil plans |
| Utility Connection | 90+ days (for some providers) | Utility application submission |
| Rough MEP Inspection | 3–5 business days (scheduling lead time) | Completion of all rough-in trades |
| Final Inspection | 1–3 weeks (including punch list) | Substantial completion |
Pull a grading permit separately so erosion control or rough grading can start while the main building permit is still under review.
Once approvals are on the calendar, tie material orders to the install dates they support.
5. Align Material Procurement With Installation Dates
Once permits are approved, build procurement backward from the install date. Treat it like part of the schedule, not just a buying job. That shift matters.
If you only track one final delivery date, you’re missing the steps that decide whether that truck shows up on time. Submittals, approvals, fabrication, and delivery should each sit on the timeline as separate events.
Start with the planned installation date and work backward through each lead time. For example, electrical switchgear can take 12–24 weeks. Custom windows and cabinets often take 8–16 weeks, so they should be ordered as soon as they’re approved. Track the order date, approval date, fabrication date, and delivery window as schedule milestones.
A small slip here can turn into a big problem fast. A two-week delay on a window order can cost $3,000–$8,000 in lost productivity. And when more than one trade is waiting on the same delivery, that delay doesn’t stay small for long.
Deliveries should match the install sequence, not arrive in one bulk drop.
Bulk deliveries that show up too early can create storage problems and theft risk. Set delivery at least four weeks before installation to give yourself room for shipping delays, and count and inspect materials on arrival before crews leave. Those delivery targets should show up in daily logs and in weekly schedule reviews.
| Material Item | Typical Lead Time | Key Scheduling Note |
|---|---|---|
| Electrical Switchgear | 12–24 weeks | Long lead time on commercial projects |
| Custom Cabinets | 10–16 weeks | Semi-custom runs 4–8 weeks |
| Custom Windows | 8–16 weeks | Order before groundbreaking if possible |
| Structural Steel | 6–12 weeks | High impact on framing start |
| Specialty HVAC | 6–14 weeks | Affects rough-in and finish phases |
6. Add Buffer Time for Weather, Labor, and Supply Risks
Once you’ve mapped lead times, protect the critical path with targeted slack. Don’t pad every task. Put buffer time where a delay would hit the critical path and threaten the finish date.
The main buffer should sit at the end of the critical path. For remodels, bump that up to 15–20% because surprises often hide behind walls – like rotten subfloors or framing that doesn’t meet code. A merge-point buffer of 2–3 days should go right before parallel workstreams come back together, such as when cabinet delivery and finish carpentry both need to be done before countertop installation can start. You can also add small phase-specific buffers inside high-risk work, like foundation work or complex MEP work, so one setback doesn’t ripple through everything that follows.
Buffers help only if you manage them on purpose. Weather and labor risk don’t work the same way, so they shouldn’t get the same treatment. Exposed tasks – framing, roofing, and concrete work – need weather days built in. Interior finishes usually don’t. On the labor side, add 2–3 days between sequential subcontractors so crews don’t pile up when one trade runs late. Use the buffered date as the client-facing finish date, and keep the actual buffer internal.
Use the table below to match each buffer type with the delay it guards against.
| Buffer Type | Where It Goes | What It Protects |
|---|---|---|
| Project Buffer | End of the full timeline | Final delivery date from cumulative delays |
| Merge-Point Buffer | Before parallel workstreams join | Parallel workstreams from delaying a shared next step |
| Phase-Specific Buffer | Inside complex phases like foundation or MEP | High-risk work from cascading delays |
7. Use Daily Logs to Track Planned vs. Actual Progress
Daily logs tell you if the schedule is staying on track or starting to slip. That matters because small delays are much easier to fix when you spot them early. They also show when schedule buffers start getting eaten up.
A 3-day delay caught in week 2 may take 1–2 days to recover; the same delay caught in week 5 can take weeks to fix.
A useful log does more than say work is “on schedule.”
It should record:
- Completed quantities
- Crew counts by trade
- Deliveries
- Equipment status
- Weather
- Planned work left incomplete, and why
If a task didn’t happen, the reason matters. Otherwise, that missed work can snowball into a much bigger schedule problem.
Write logs the same day the work happens. Backfilled logs carry less weight in disputes and audits. Mobile logs also tend to get used more consistently, often reaching 85% to 100% versus 40% to 70% for paper logs. Contractor Foreman’s daily log feature records crew counts, weather, work completed, and photos from the field. Those logs then feed the weekly schedule review.
Apply the 2-Day Rule: flag any task that is 2 or more days behind plan and assign recovery right away.
8. Review and Update the Schedule Every Week
A schedule that never changes goes stale fast. It’s not under control. A weekly review helps you spot drift before later trades get stuck with bad dates.
Set aside 30 minutes each week to update actual quantities, finish dates, and remaining durations. Then send any changes to affected subcontractors that same day. Each week, compare actual progress against the baseline schedule so the review works like a control loop for the plan, not just another admin chore.
Recheck the critical path every week. Tasks with float can turn critical as delays stack up. Also share a rolling 2–3 week look-ahead with all active trades so subcontractors stay aligned with upcoming start dates.
Use input from the superintendent and foremen when you update the schedule. Then put that weekly update into one shared contractor scheduling app so every trade works from the same timeline and the master timeline stays current for everyone involved.
9. Centralize Timeline Management With Contractor Foreman
The practices above only work if every update ends up in one shared schedule. A construction timeline can drift fast when one detail sits in a spreadsheet, another in a text thread, and the next in an email.
Contractor Foreman puts construction scheduling software, project management, and daily progress updates in one place. Crews can log progress in the same system, which helps keep the schedule current. Those live site-to-office updates also help keep planned vs. actual data accurate across every active job.
The platform includes alerts that flag deadline and sequence conflicts before they slow down the schedule. With real-time dashboards and reporting, project managers can check each job’s status without digging through scattered files. You can also tie material orders and labor availability to the schedule, so delays show up early instead of blindsiding the team.
Use the tables below as a quick reference for the dates, lead times, and buffers this system should track.
Tables to Support the Best Practices
These tables boil down the lead times, dependencies, and buffers that most often push a schedule off track.
Use this table to keep an eye on the approvals that most often slow down the critical path.
| Permit/Inspection Type | Typical Lead Time | Gated Activity | Common Delay Risks |
|---|---|---|---|
| Residential Addition Permit | 2–4 weeks | Mobilization | Incomplete docs, agency backlog |
| Custom Home Building Permit | 6–12 weeks | Groundbreaking | Incomplete docs, agency backlog |
| Rough MEP Inspection | 3–5 business days | Drywall/Insulation | Failed QC, inspector no-show |
| Utility Coordination | 4–8 weeks | Permanent Power | Utility company scheduling |
| Final Inspection | 1–3 weeks | Client Move-in/Turnover | Minor punch list items |
Next, use trade dependencies to confirm the work sequence. This table helps you see the dependency type and the next task it controls.
| Trade/Task | Dependency Type | Prerequisite Task | Conflict/Risk |
|---|---|---|---|
| Rough Plumbing & Electrical | Start-to-Start (SS) | Framing Completion | Space congestion in 2,500 sq ft zones |
| Drywall Installation | Finish-to-Start (FS) | Rough-in Inspection Approval | Moisture trap if roof isn’t dried-in |
| Countertop Installation | Finish-to-Start (FS) | Cabinet Installation + Template | Template errors if cabinets aren’t level; 2–3 week fabrication lead time |
| Interior Painting | Finish-to-Finish (FF) | Trim Carpentry | Dust contamination from sanding |
Last, place buffers where they protect the critical path, not on every task. Use this table to set buffers where delays would hit the finish date.
| Buffer Type | Placement | Recommended Size | Risk of Misuse |
|---|---|---|---|
| Scattered Padding | Added to every individual task | Not recommended | Do not pad every task. Place buffers only where delay threatens the finish date. |
| Feeding Buffer | Before merge points or high-risk handoffs | 2–3 days | Can over-complicate schedule logic if overused |
| Project Buffer | End of schedule | 10–15% of total duration | Client may try to treat it as extra working time |
Conclusion
Construction timelines hold together when dates, dependencies, permits, procurement, buffers, and updates are handled as one connected system. These nine practices work best when they keep dates, trades, permits, materials, and team updates lined up.
Miss just one piece, and delays can snowball fast. A 3-day slip in week 2 can turn into a 10–15 day setback by the end of the project. That’s why the goal isn’t just to build a schedule on paper. It’s to have a schedule you can use, track construction projects, and adjust when jobsite conditions shift.
Contractor Foreman brings scheduling, daily logs, project management, and financial tracking into one web and mobile platform. With one place for the full picture, it’s easier to keep the timeline current when field conditions change.
FAQs
How do I find the critical path?
Define your project scope first. Then split the work into phases and list every task that needs to happen. After that, map the dependencies between tasks, such as finishing the foundation before framing starts.
The critical path is the longest chain of dependent tasks in your schedule. It sets the shortest time your project can be finished. If any task on that path slips, the whole timeline slips with it.
How much buffer time should I add?
Add a 10%–15% project buffer at the end of the full schedule. For higher-risk phases like foundation work or complex mechanical installations, add another 10%–15% buffer to those tasks too.
It also helps to place 2–3-day feeding buffers at merge points where one work stream depends on another. That way, if one path slips a bit, it doesn’t throw the whole job off track.
Share the buffered date with the client as the committed completion date.
What should a daily construction log include?
A daily construction log should track the core facts first: project name, jobsite location, date, shift times, and the person who wrote the report.
From there, it should document what happened on-site during the day, including:
- Workforce activity
- Work performed
- Weather conditions
- Material deliveries
- Equipment status
- Site visitors
- Safety incidents or near-misses
- Site photos that show progress and jobsite conditions
Think of it as the jobsite’s daily paper trail. If someone needs to look back and figure out who was there, what got done, what showed up, or what went wrong, the daily log should have the answer.